

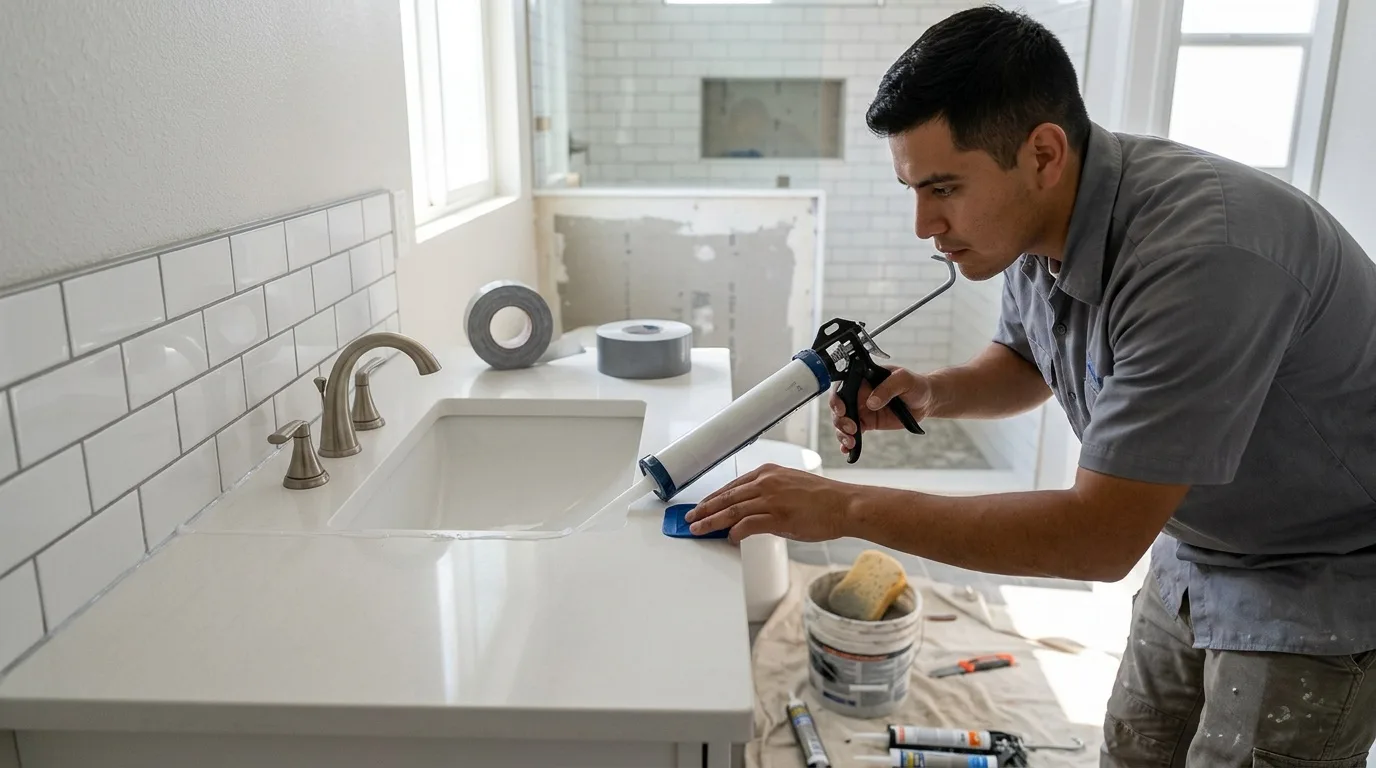
Why bathroom joints need waterproofing
A bathroom is a small room, often without windows, with the door kept closed. When ventilation is poor, moisture accumulates. Within that limited area there is a significant number of joints and junctions: the bathtub, sink, and toilet all meet the walls and floor. If these spots are not sealed, water pools in them, creating conditions for mold and bacteria to develop. In Chula Vista, where warm weather keeps bathrooms humid most of the year, the problem only gets worse.
A quality repair in the bathroom is not just a matter of looks — it is a matter of safety for the people living in the house. If mold has taken hold in a bathroom, that is a direct threat to the health of everyone under the same roof.
Main methods for sealing joints
The choice of method depends on the width of the gap. For gaps up to about 5 mm, sealant or grout will do. For gaps from 5 to 50 mm, expanding foam, cement mortar, or a snap-on corner trim is appropriate. Gaps wider than 50 mm typically call for a frame made of cement board or backer board, then tiled over.
Expanding foam
Expanding foam is used for larger gaps of 2–3 cm. Only moisture-resistant foam should be used. It resists rotting, does not let water through, lasts a long time, and has good mechanical strength. The process is straightforward: clean and dry the surface, tape off the edges with painter's tape, apply using a foam gun, let it cure for 15–20 minutes, trim the excess, and cover with a decorative trim piece.
Sealant
Sealant is suitable for gaps up to about 1.5 cm. Several types of sealant exist, each with its own characteristics — silicone, acrylic, polyurethane, and hybrid formulations. The application steps are: clean and degrease the surface, mark the boundaries with painter's tape, apply the sealant with a caulking gun, smooth with a spatula or a finger dipped in soapy water, wipe away the excess with a sponge. Drying time is roughly 12–15 hours.
Self-adhesive border tape
A self-adhesive border tape made of polyethylene with a fold line down the center at 90 degrees is a simple and inexpensive option. Clean and degrease the surface, peel back the protective film gradually, press the tape firmly against both surfaces, use a plastic spatula to form the angle. Full bonding takes about 24 hours. The tape gives a uniform width, requires no complex tools, produces no dust or drips, and needs no masking with painter's tape. Once installed, waterproofing is immediate — there is no waiting for anything to cure.
Plastic or ceramic borders
When the gap is larger than 2–3 cm, rigid border strips — either plastic or ceramic — are a practical solution. The adhesive used must be moisture-resistant, mechanically strong, quick to grab, resistant to deformation, and compatible with PVC and ceramic. If the gap is wide, fill it with foam first, then cut the border strips to length, miter the corners at 45 degrees, apply adhesive to the back, and press the strip against both surfaces. After drying, treat the joints with grout.
Types of sealant for bathroom joints
Silicone sealant
When people mention sealant for a bathroom, they usually mean silicone. Its base is organosilicon compounds — polyorganosiloxanes. These substances are extremely elastic, stretching up to 400 percent, even at very low temperatures. Silicone sealant is waterproof, strong, handles temperature swings well, and bonds to most surfaces.
Silicone sealants come in two varieties: acid-cure (acetoxy) and neutral. Acid-cure types cause corrosion on metals, so they should not be used on metal surfaces or on materials sensitive to acid — marble, limestone, certain plastics. For bathroom work a neutral formulation is recommended.
There are drawbacks worth knowing. White silicone can yellow over time. Silicone attracts dust. It cannot be painted over. And if a section of the joint fails, you cannot patch it — the old bead has to be fully removed and a new one laid down.
Acrylic sealant
This is a one-component sealant based on a water emulsion of acrylic polymers. Once dry, it becomes water-insoluble. Its main advantages: no toxic fumes, can be thinned with water, wide color range, can be painted after drying, and a failed section of the joint can be repaired without redoing the entire bead. Acrylic sealants bond well to porous materials and have a service life of at least 10 years indoors. They also stay vapor-permeable, which is a plus. The downside is limited elasticity — around 15 percent — and a tendency to peel under prolonged direct water exposure.
Silicone-acrylic (siliconized) sealant
These combine the strengths of both types. Like plain acrylics they are safe, non-aggressive to metals, can be repaired in sections, and take paint. But unlike plain acrylics, siliconized versions are more temperature-stable, stretch up to 200 percent, resist water better, and last up to 15 years indoors.
Polyurethane sealant
One-component polyurethane sealants are made from polyester resins. They bond to a wide range of materials including porous ones, have low shrinkage, high elasticity under temperature and weather stress, resist moisture, UV, mild acids and alkalis. They apply well on vertical surfaces without sagging, absorb vibration, and can be painted with water-based paints. They do not corrode metals. The trade-off is a longer cure time — polyurethane should not be exposed to water for three to seven days.
Hybrid sealants (MS-polymer)
Hybrids are based on polyurethane with a silicone component. They carry the same advantages as polyurethane, but the silicone element makes the cured joint stronger and longer-lasting. Many professionals consider hybrid MS-polymer sealants the best available choice for bathroom joints. They cure without bubbles, show zero shrinkage, have no porosity, and do not generate static — so the finished joint does not attract dust.
Grout versus sealant: when to use which
Grout is a mixture of water, cement, sand, and pigment, sometimes with fine aggregate added. It is considerably thicker than sealant and is meant for filling gaps in a single plane — the spaces between tiles. Grout is wear-resistant but not very flexible, so it can crack and cannot withstand mechanical loads or vibration. It works well for tile-to-tile joints on flat surfaces.
Silicone sealant, on the other hand, fills gaps and joints where two surfaces meet at an angle — the tub against the wall, the shower pan against the tile. It is waterproof, handles movement and vibration, and creates an elastic bond. It is harder to apply neatly than grout and can stick to surfaces in ways that complicate cleanup, but for corner joints and changes in plane it is clearly the right material.
The short rule for Chula Vista homeowners: grout for tile joints on the same flat surface, sealant for every seam where two different surfaces meet — tub-to-wall, floor-to-wall, around fixtures. Bathrooms in homes across nearby National City follow this rule too.
Step-by-step: applying sealant to a bathroom joint
Before you start, gather a caulking gun, a tube of waterproof sealant, painter's tape, wet wipes, and a rag.
- Choose the sealant. For bathroom joints, silicone is the most common choice. You need a flexible material that will not crack under mechanical stress. Look for a product labeled as sanitary or bathroom-grade — these contain fungicide additives that inhibit mold.
- Prepare the surface. Apply strips of painter's tape along both sides of the joint, leaving just the gap exposed. This keeps sealant off the tile face and the tub edge. If you are replacing old sealant, remove every trace of it first — residue will prevent adhesion.
- Fill the tub. Before applying sealant to the joint between the tub and the wall, fill the tub about halfway with water. The weight widens the gap slightly. A bead applied under this load will not tear when the tub flexes during normal use.
- Apply the sealant. Cut the nozzle tip — a wider cut for a thick bead, a narrow one for a thin line. Hold the gun at 45 degrees to the surface. Lay down a continuous bead with no gaps. If you miss a spot, go back and fill it.
- Smooth the bead. Run a finger or a small spatula dipped in soapy water along the bead in one steady pass. Do not go back and forth. Keep dust and debris off the wet sealant.
- Remove the tape and clean up. Pull the painter's tape off immediately, before the sealant skins over. Wipe any smears from adjacent surfaces with a damp rag. If sealant hardens where it should not be, you will need a razor blade and solvent to remove it.
- Let it cure. The surface may feel dry within an hour, but full cure takes at least 24 hours. Until cured, the joint is not truly waterproof. Do not run water over it, and keep dust away. In cooler or poorly ventilated rooms the cure can take several days.
A few practical notes
- Do not apply sealant in multiple layers. The bond between layers is weak and leads to delamination.
- Specialists do not recommend heating the room to speed up curing. A hair dryer can soften silicone to the point of melting. Polyurethane should not be applied in cold conditions at all.
- Check the expiration date on the tube. Old silicone and acrylic formulations may not seal properly.
- For joints that see a lot of movement — such as a freestanding tub on a tile floor — polyurethane or MS-polymer sealant is a better choice than silicone, because of its superior elasticity and vibration resistance.
- Acrylic sealant dries as water evaporates from the material, so a fan in the room speeds the process. Silicone, conversely, needs ambient moisture to polymerize.
When to redo the seal
Despite manufacturer claims about long-lasting mold protection, bacteria do eventually appear in high-humidity environments. Even strong joints break down with time. Discoloration that does not come off with bleach, visible cracks, or edges pulling away from the surface all mean the sealant has failed and should be replaced. Remove the old bead completely — cutting it out with a utility knife and cleaning the residue with solvent — then follow the steps above to lay a fresh one.
Re-sealing every few years keeps the bathroom clean and prevents water from reaching the subfloor or wall framing, where it can cause damage that is far more expensive to repair than a tube of sealant. Seal failures like this also cause water damage in Imperial Beach homes.
Once a failed seal has let water into the subfloor or wall framing, the drying and repairs fall under water damage restoration in Chula Vista. When belongings have to come out first, our pack-out and restoration crews in Chula Vista handle that side as well.