

Why Time Is the Main Factor
One of the most common types of damage to paper — whether it is personal documents, family photographs, or books — is water damage. After a flood, a burst pipe, or a roof leak, homeowners in Lakeside often face a situation where important papers and irreplaceable photos have been soaked through. The key factor that determines whether salvage efforts succeed is time. As a rule, the first 48 hours decide everything. In a damp environment, mold and fungal spores begin to develop rapidly, and after that point recovery becomes far more difficult or outright impossible.
Moisture in paper leads to warping, ink bleeding, adhesive failure on bindings, water stains, and — if drying is done improperly — permanent deformation. The sooner you act, the more you can save.
Immediate Steps: The First Minutes After Discovery
When you discover that documents or photographs have been exposed to water, the very first thing to do is remove them from the wet area. Take papers off the floor, pull photo albums out of drawers, retrieve files from cabinets. Move everything to a dry room or, if the whole house is affected, to a covered outdoor area where there is airflow.
Before you begin any drying procedure, gently blot the surface of each document with a dry, soft cloth or paper towels to remove excess water. Do not rub — rubbing smears ink and damages the paper fibers. For photographs, the same rule applies: press a soft cloth lightly against the surface, then set the photo aside face-up.
If documents have multiple pages, carefully separate them from each other to allow air to circulate between sheets. Pages that are left stuck together will bond permanently as they dry, especially if the paper has a glossy or coated finish.
How to Dry Paper Documents Correctly
Place documents on a flat surface in a well-ventilated space, away from direct sunlight and direct heat sources. Lay pages on paper towels or on a mesh surface (a window screen works) so that air reaches both sides of each sheet.
For thicker documents — passports, notebooks, bound files — insert absorbent paper (paper towels, unprinted newsprint, or filter paper) between every few pages. Replace the absorbent sheets regularly, at least every five to six hours, because saturated inserts stop pulling moisture from the documents.
If humidity in the room is high, use a fan or run an air conditioner to keep air moving. Make sure the airflow is not aimed directly at the documents — a gentle indirect current is enough. A dehumidifier in the same room speeds things up considerably.
Do not use a hair dryer, space heater, or any other direct heating device. Heat causes paper to curl, warp, and become brittle. It can also cause inks and toners to smear or transfer between pages.
The Freezing Method: When You Cannot Dry Right Away
If you have a large volume of wet papers and cannot begin drying them within the critical 48-hour window, do not set them aside for later — freeze them instead. Remove surface water, place the documents into loosely sealed plastic bags, and put them in a household freezer. Leave them there for two to five days.
Freezing halts mold growth completely and buys you time to organize proper drying later. This approach is regularly used by archival institutions and libraries after disasters. The Library of Congress recommends it as a standard emergency measure.
When you are ready to proceed, remove the documents from the freezer and let them thaw slowly in a ventilated space, placing absorbent paper underneath and between pages as they soften. Change the towels frequently as water leaks out during thawing.
Vacuum freeze-drying for severe cases
Vacuum sublimation drying is recognized worldwide as the best available method for restoring water-damaged paper. Frozen material is placed in a vacuum chamber where the ice turns directly into vapor, bypassing the liquid water stage entirely. The result is minimal warping and excellent preservation of ink — including handwritten texts done in fountain pen. This is an industrial process, though, and requires specialized equipment. Restoration companies in the San Diego area that handle disaster recovery can often arrange access to such facilities.
Saving Wet Photographs
Photographs require even more care than ordinary paper. A printed photo has an emulsion layer — a gelatin coating that carries the image — and this layer becomes extremely fragile when wet. Rough handling will scrape the image right off the paper base.
Gently lift each photograph by its edges. Do not touch the image surface with your fingers. If photos are stuck together, do not try to pull them apart while dry — you will tear the emulsion. Instead, soak the stuck photos in a tray of clean, cool water for a few minutes until they separate on their own.
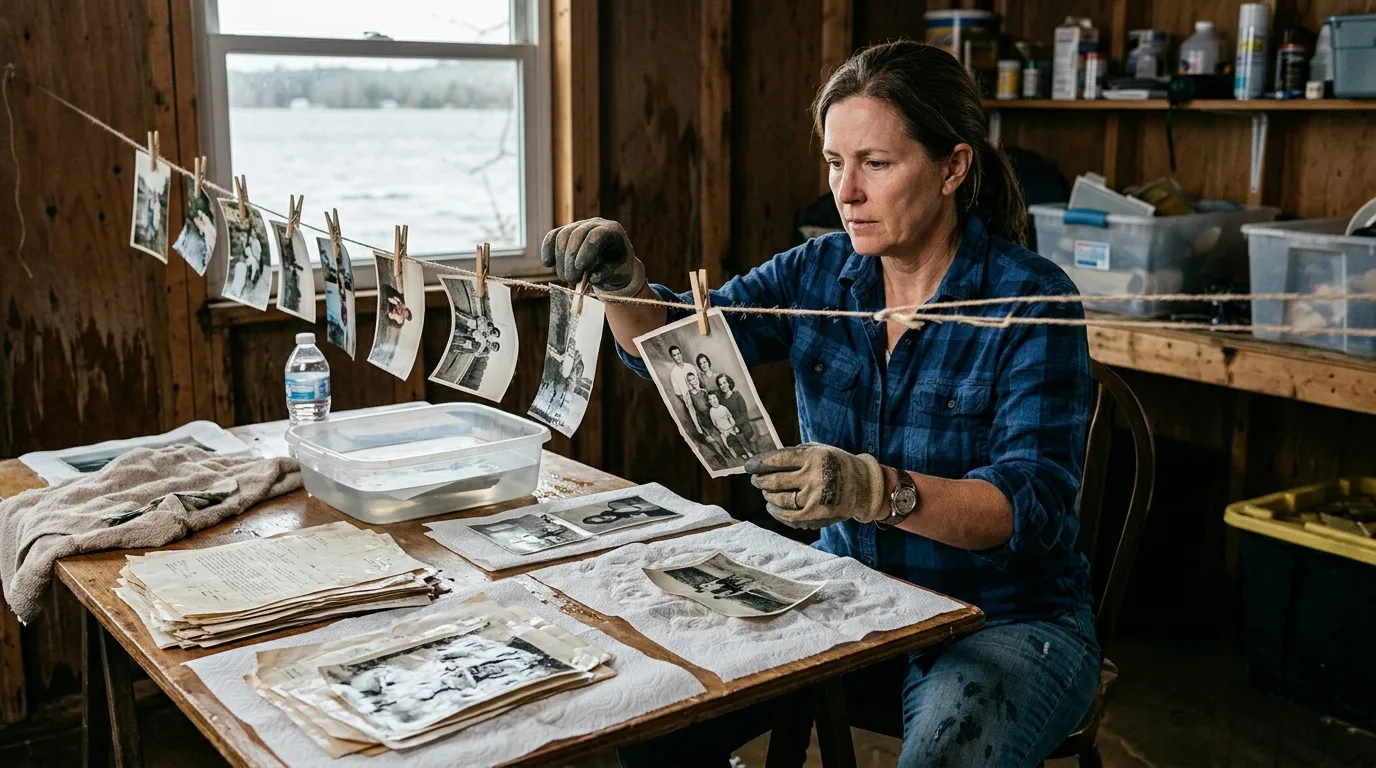
Once separated, lay each photograph face-up on a clean, non-stick surface. Paper towels work, but wax paper or plastic wrap underneath prevents sticking. Let them air-dry in a shaded, ventilated spot. Do not use clothespins to hang photos — the clips leave marks and the weight of the wet paper can cause tearing.
If glossy photos begin to curl as they dry, you can place them under a light, even weight (a clean book on top of a sheet of wax paper) once they are about 80 percent dry. Pressing too early traps moisture and encourages mold.
Digitizing before it is too late
If photographs are badly stained or partially damaged but the image is still visible, scan them as soon as they are dry enough to handle. A flatbed scanner at 600 dpi captures enough detail for later digital restoration. Modern photo-editing software can remove water spots, correct color shifts, and fill in missing areas with surprising accuracy. Volunteer restoration projects after major floods have shown that even heavily damaged images can be brought back to a presentable state using these digital tools.
The point is: get the image into a digital file before further degradation occurs. A scan of a stained photo is infinitely better than a photo lost entirely to mold two weeks later.
Handling Books and Bound Albums
Books that have been submerged need to be dried with the pages fanned open. Stand the book upright in a tent shape if it will hold that position, or lay it open on absorbent paper. Insert filter paper or paper towels between every few pages and replace the inserts as they become damp.
For books with coated (glossy) paper, act quickly — coated pages stick together within hours and become inseparable once bonded. Interleave every single page with wax paper or non-stick parchment paper as soon as possible.
Direct a fan at the room, not at the books. Air circulation is essential, but strong direct airflow flips pages and causes uneven drying, which leads to warping.
Once a book is nearly dry — still slightly cool to the touch but no longer visibly damp — close it and place it under a stack of heavy books or a flat weight. Leave it under the press for several days. This step restores the book's shape and prevents the cover boards from bowing outward.
Antique books, rare volumes, and leather-bound albums should not be dried at home. The materials and adhesives used in older bindings respond poorly to amateur drying methods. Take them to a professional book conservator.
Preventing Mold After the Documents Are Dry
Mold can colonize paper when ambient humidity exceeds 65 to 68 percent. After a flood, indoor humidity in a Lakeside home can remain dangerously high for days or weeks, especially in rooms with poor ventilation. Flooded homes in nearby Santee can stay damp just as long. Over 200 species of fungi are known to damage paper, and about 40 species permanently inhabit archival storage environments. At humidity levels of 85 to 100 percent, these organisms can destroy up to half the cellulose in paper within two months.
After drying your documents and photos, store them in a room where humidity is controlled — ideally below 55 percent. Run a dehumidifier if necessary. Avoid storing recovered papers in garages, sheds, or closets against exterior walls where moisture tends to accumulate.
Inspect your saved documents regularly for the first few weeks. If you notice colored spots, a musty smell, or a fuzzy surface, isolate the affected items immediately and consult a restoration specialist.
When to Get Duplicates Instead of Restoring Originals
For certain categories of documents, it is simpler and cheaper to obtain duplicates than to attempt restoration. Birth certificates, vehicle titles, insurance policies, tax returns — the issuing agencies, banks, and government offices can reissue these. Contact them as soon as possible, because replacement requests after a disaster are time-sensitive.
Focus your drying and restoration efforts on items that cannot be replaced: family photographs, personal letters, handwritten notes, children's artwork, one-of-a-kind legal documents with original signatures.
Documenting the Damage for Insurance
Before you move or begin drying anything, photograph and video-record the scene. Take wide shots showing the extent of water in each room, then close-ups of individual damaged items. This visual evidence is critical for insurance claims. If you have receipts, purchase records, or appraisals for damaged property, gather those as well — they help establish the value of what was lost or harmed. These records matter just as much after water damage in nearby El Cajon homes.
If the flooding was caused by a municipal water main break, a neighbor's plumbing failure, or a natural event, contact your local emergency management agency and your insurance company on the same day. Request a written report or incident number from the responding agency. These records form the foundation of your claim.
When a flood has soaked more than papers and photos, drying out the walls and floors falls under water damage restoration in Lakeside. For homes further up in the hills, see water damage restoration in Alpine.