

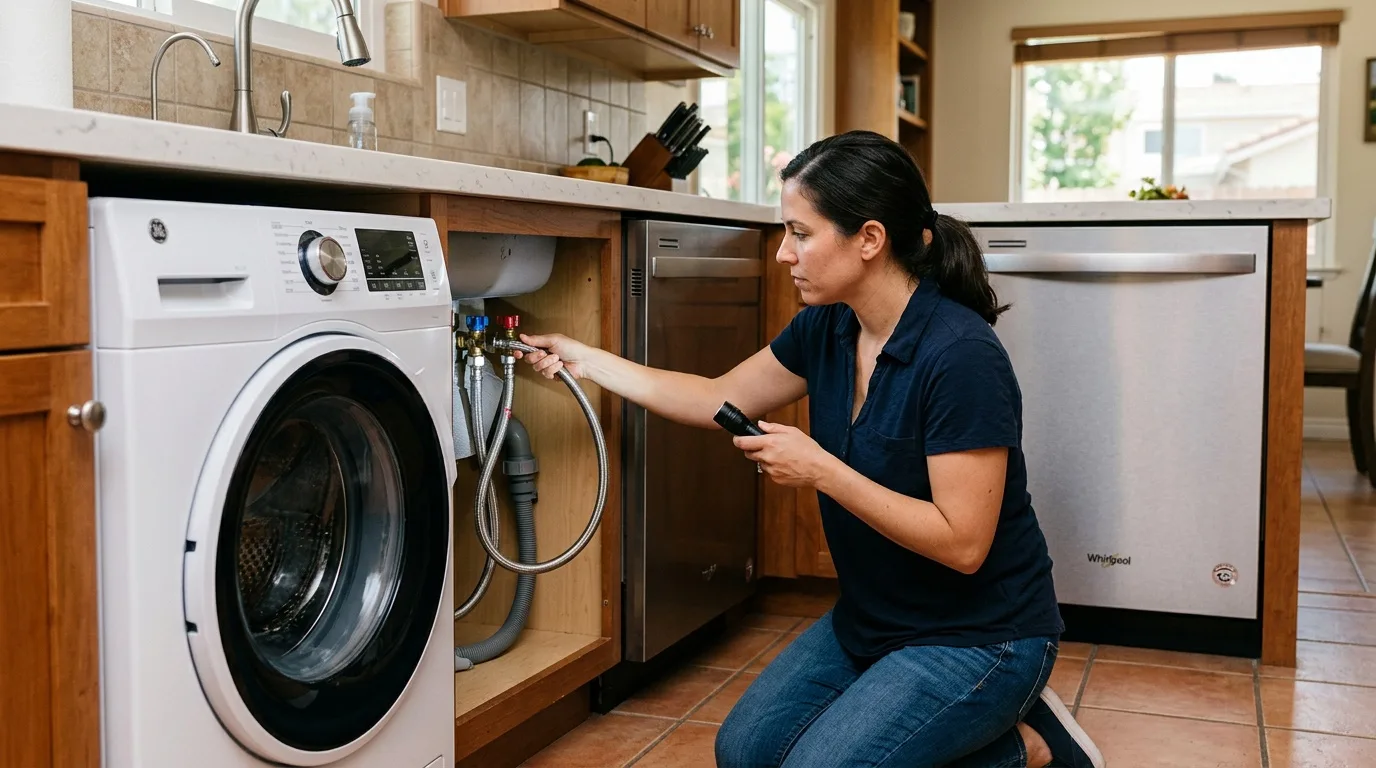
What to do first when you find a puddle
You walk into the kitchen or laundry room and there is water on the floor near the appliance. Before you start diagnosing anything, take care of the basics. Unplug the machine from the outlet — or, if you cannot reach the plug safely without stepping in water, switch off the breaker that feeds it. Then shut off the water supply valve. On most El Cajon homes, the washing machine has a dedicated pair of hot and cold valves on the wall behind it; the dishwasher usually feeds off the hot-water line under the kitchen sink. Close those valves. If you have laundry still inside the washer, drain the remaining water through the filter hatch at the bottom front of the machine, then pull the clothes out.
These steps take two minutes and they prevent the two things that actually turn a small leak into a disaster — an electrical short and continued flooding.
Leaks that are not really the machine's fault
Before you blame the appliance, rule out the surroundings. In many cases the water on the floor comes from a neighboring pipe, a loose connection under the kitchen sink, or even condensation dripping off the garbage disposal. If the puddle appears only when you run the dishwasher and the sink at the same time, the problem is likely a clogged sink siphon — water backs up and overflows through the dishwasher's drain hose connection. Clearing the siphon or adding a check valve on the drain hose fixes it without touching the dishwasher at all.
Another common non-fault: opening the dishwasher door right after the drying cycle. Steam escapes, condenses on the underside of the countertop, and drips down the front of the door onto the floor. It looks like a leak, but the machine is fine. Just let the cycle finish and wait a few minutes before opening.
Simple washing machine problems you can fix yourself
Loose drain filter
The drain filter sits behind a small hatch at the bottom front of the washer. If you recently unscrewed it for cleaning or to drain water manually, it may not be threaded back in tightly. Unscrew it, check the rubber gasket, screw it back in firmly but without forcing it. Run a short cycle and watch.
Detergent tray overflow
Too much powder — or a gel that foams heavily — creates suds that overflow from the dispenser tray and run down the front of the machine. The tray itself may be caked with old detergent residue that blocks the water jet. Pull the tray out, soak it in hot water, scrub it clean, and cut back on the amount of detergent you use. Modern concentrated detergents need far less than the scoop suggests.
Fill hose connections
The braided fill hoses connect to the valves on the wall and to the back of the machine. Over time the rubber washers inside the couplings compress and stop sealing. Feel the connections with a dry hand while the machine fills — if they are damp, tighten the coupling a quarter turn. If the washer is old, replace the rubber washers or swap in stainless-steel braided hoses, which last longer and resist bursting.
Machine not level
A washer that rocks on the floor vibrates more than it should, and that vibration loosens internal hose clamps over time. It also causes water to slosh out of the tub during high-speed spins. Check with a bubble level across the top, front to back and side to side, and adjust the feet until it sits flat.
Wrong detergent type
High-efficiency (HE) front-load washers require HE detergent. Regular detergent produces too much foam. That foam pushes past the door gasket or backs up into the dispenser. If you see foam leaking from around the door, switch to HE detergent and run an empty hot cycle to flush the residue.
Washing machine problems that usually need a technician
Damaged drain hose
The corrugated drain hose runs from the back of the machine to the standpipe or sink drain. It gets kinked when you push the washer back against the wall, or cracked when you pull it out for cleaning. A damaged hose leaks during the drain and spin portions of the cycle. Patching it with tape is a temporary measure at best — the hose flexes with every drain cycle and the patch fails. Replacement is the reliable fix.
Torn tub-to-pump boot (drain boot)
Inside the machine, a thick rubber boot connects the outer tub to the drain filter housing. Coins, hairpins, bra underwires, and small screws that escape pockets can puncture it. The leak shows up as water under the machine at any point in the cycle, because the boot holds water as soon as the tub starts filling. A technician pulls the front panel, removes the old boot, and installs a new one — the job takes about an hour.
Door gasket (front-loaders)
The rubber bellows around the door opening on a front-load washer seals the tub during the wash. Sharp objects from pockets — safety pins, toothpicks, zipper pulls — can puncture it. You may also see cracking and hardening on machines older than seven or eight years, especially in the dry El Cajon climate where rubber ages faster. Rubber seals wear out just as quickly in homes in nearby Santee. A small nick can sometimes be patched with a purpose-made rubber patch kit, but a split or cracked gasket needs full replacement.
Worn tub bearing seal
The shaft seal behind the inner drum keeps water from reaching the bearings. When the seal wears out, water seeps past it, washes grease out of the bearings, and the bearings corrode. You will hear a growing rumble or grinding noise during spin, and you may notice a small dark or rust-colored puddle under the machine. By the time you see water, both the seal and the bearings need replacing — the job involves pulling the drum out of the tub.
Cracked outer tub
A foreign object trapped between the drum and the tub — typically an underwire or a bolt — can wear a hole through the plastic tub wall. The leak may appear only during spin when centrifugal force throws water outward, or throughout the cycle if the hole is at the bottom. Replacing the tub is a major repair; on older machines it may not be cost-effective.
Simple dishwasher problems you can fix yourself
Clogged filters
The mesh filter at the bottom of the dishwasher tub catches food particles. When it clogs, water circulation slows, the tub overfills relative to the jets' capacity, and water creeps past the door seal. Pull the filter assembly out (consult the manual — most twist-lock), rinse it under running water, clear the drain well underneath, and reinstall. Do this once a month if you run the machine daily.
Dirty door gasket
Food residue, grease, and detergent film build up along the rubber gasket that lines the door opening. The grime prevents the gasket from seating flush against the tub. Wipe it down with a damp cloth and mild dish soap — do not use abrasive cleaners or solvents, which dry out the rubber. A clean gasket seals better than a new gasket that was installed over a dirty surface.
Too much or wrong detergent
Dishwasher detergent is formulated to produce very little foam. If someone uses regular hand-dishwashing liquid — the kind you squirt from a bottle — the foam fills the tub, overflows past the gasket, and pours onto the floor. The fix is obvious, but recovering from it takes a step: run an empty cycle at high temperature to flush residual soap, and wipe any foam out of the tub and the sump by hand.
Machine not level
A dishwasher tilted forward lets water pool at the front of the tub and seep out the bottom edge of the door. Check the level, adjust the front feet, and make sure the rear feet (or rear wheels) are seated on the floor properly. Most dishwashers also have a bracket that screws into the underside of the countertop — if it is missing, the machine can shift when you load heavy dishes.
Dishwasher problems that usually need a technician
Worn door seal
Over time the rubber gasket hardens, compresses unevenly, or tears at the corners. Water appears along the bottom edge of the door during the wash cycle, especially during the main wash when the sprayer arms are running at full pressure. Replacement involves removing the inner door panel to access the gasket channel.
Faulty water-level sensor (pressure switch)
The pressure switch tells the control board when the tub is full. If the switch or its pressure tube is clogged or cracked, the machine overfills. Water rises above the door seal line and leaks out the bottom corners. The tube can sometimes be cleaned with compressed air; a failed switch needs replacement.
Cracked spray arm or damaged impeller
A cracked spray arm throws water at odd angles, hitting the door gasket in spots where it was never designed to seal. A damaged upper impeller can send a jet straight at the door hinge area. Replacement spray arms are usually inexpensive parts, but reaching the upper arm may require removing the rack tracks.
Internal hose and clamp failures
Inside the dishwasher, several rubber hoses connect the fill valve, the circulation pump, the drain pump, and the tub. Clamps loosen from repeated heating and cooling cycles. A loose clamp or a cracked hose will drip into the base pan and trigger the flood sensor (Aquastop). The machine stops mid-cycle, drains, and shows an error code — E15 on Bosch, i30 on Electrolux, AL01 on Ariston. A technician needs to pull the machine out, remove the base plate, identify the leaking joint, and either re-clamp or replace the hose.
Corroded wash tub
Stainless steel tubs rarely corrode, but plastic tubs can crack, and welds on cheaper steel tubs can develop pinhole leaks after years of contact with salt and rinse aid. If the tub is leaking, replacement is usually the only option. On an older dishwasher, this repair may cost more than the machine is worth.
Prevention: a short checklist for both machines
- Check pockets before every wash load — coins, pins, screws, and paper clips cause most of the internal damage in a washing machine.
- Wash bras and delicates in a mesh laundry bag so underwires stay contained.
- Scrape dishes before loading the dishwasher, but you do not need to pre-rinse — modern detergents work better with some food residue to cling to.
- Clean the dishwasher filter once a month and the washing machine drain filter every two to three months.
- Inspect the fill hoses behind the washer once a year. If they are rubber and more than five years old, replace them with braided stainless steel.
- Run an empty hot cycle with a descaling agent in the washing machine every three to four months — hard water in parts of El Cajon leaves mineral deposits that narrow hoses and clog valves. Owners of homes in nearby La Mesa can follow the same routine.
- Keep both machines level. Re-check after any floor work or if you pull them out for cleaning.
Most kitchen and laundry floods start small — a damp spot under the machine that you ignore for a week. By the time the puddle is obvious, the subfloor or the cabinet base may already be swelling. Catching a leak early almost always means a simpler, cheaper repair.
When an appliance leak has already reached the subfloor or cabinet base, the drying and repairs belong to water damage restoration in El Cajon, with the same service next door through water damage restoration in Lakeside. A separate El Cajon site also outlines their water damage service.