

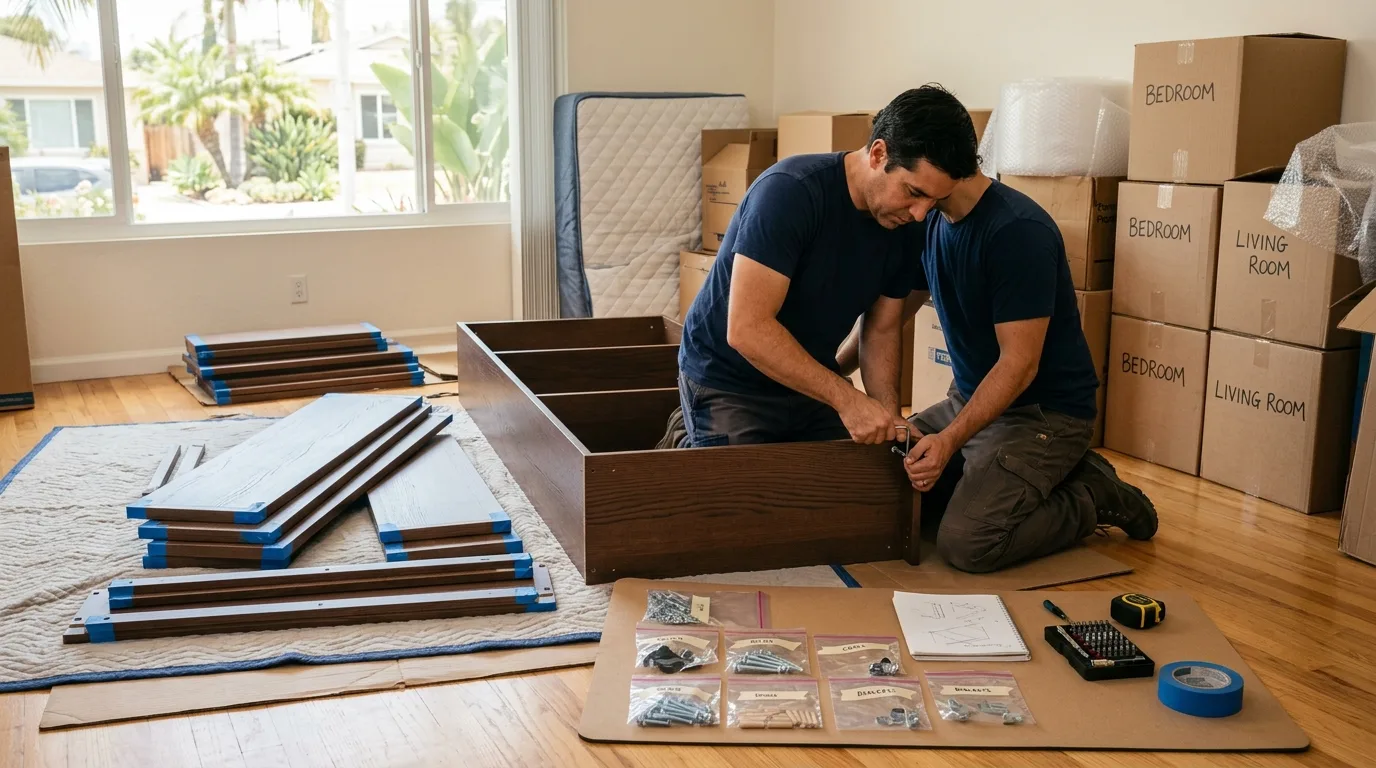
Why Proper Disassembly Matters
Moving is one of the most labor-intensive events in any household's life. The hardest part is often the furniture — its safe disassembly and subsequent reassembly determine whether your belongings survive the trip intact. Every bolt, every washer, every bracket matters and demands particular attention. Knowing how to take furniture apart correctly becomes a necessary skill for minimizing risk during a San Diego County move, whether you're heading across Chula Vista or relocating from Oceanside to El Cajon. Moves into homes in El Cajon and other inland towns follow the same steps.
Before You Start: Planning and Measuring
Begin with a careful assessment of your surroundings. Study the available clearances between doorframes, stairways, and elevators. This will help you establish the best order of disassembly and identify which pieces need extra preparation. Then gather all the tools you will need — screwdrivers, wrenches, a mallet, and anything else required for breaking down and later rebuilding the furniture.
It helps to start with the largest, most complex items — wardrobes, bookshelves, bed frames — and work toward smaller pieces like chairs and nightstands. Every part should be labeled so that after the move you can quickly figure out where it belongs in the new place. Prepare labels or stickers for marking disassembled parts and bags of fasteners so nothing goes missing.
Take photographs and write down special notes for reassembling the more complicated items. This will save you a great deal of confusion later. Wrap disassembled parts in protective film or bags to prevent damage during transport. Fasten hardware securely and handle fragile components with care.
Make a List First
Put together an inventory of every piece of furniture you plan to move. This lets you estimate the volume of work, understand what actually needs to come apart, and arrange the right truck and crew ahead of time. Photograph each room — those pictures will make reassembly far simpler.
Some items are easier to sell or give away than to haul across San Diego County, especially if they will not fit the layout of the new place.
Tools You Will Need
For a successful furniture teardown you need specific tools that make the job safer and more efficient.
- Screwdrivers — Phillips and flat-head, for removing screws and fasteners that hold parts together.
- A mallet — useful for tapping out stubborn pins or nudging joints that have seized up. Do not use a hammer as a universal fix; if a part will not come free, it is likely held by a hidden catch, and striking it can crack a panel or bend metal.
- Wrench set — for bolts and nuts of various sizes. A set of hex keys is essential for flat-pack and modern furniture.
- Power driver with adjustable torque — saves time, but use it carefully. Old fasteners can seize or strip. Loosen by hand first, then continue at low speed.
- Pliers — for gripping small hardware or pulling staples.
- A utility knife — for cutting packing materials, tape, and stretch wrap.
- A level — ensures correct alignment when you set everything back up at the new address.
- Marker and masking tape — for labeling every panel and bag of fasteners.
- Sturdy zip-lock bags — for organizing screws, bolts, cam locks, and other small parts.
Step-by-Step Disassembly
Step 1: Inspect Before You Unscrew
Look over each piece carefully and note all the details and important points of disassembly so you can put it back together without problems later. Do not start unscrewing every visible fastener — some hold the structural frame. Before each action, understand the purpose of the joint you are about to open.
Step 2: Remove Loose and Detachable Parts
Take out all removable components — drawers, shelves, cushions, seats — and set them aside. Mark every piece so you can identify its position during reassembly. If a seat or cushion has a removable cover, bag it separately.
Step 3: Unfasten Hardware
Using the right tool, remove all screws, nuts, cam locks, and other fasteners connecting the parts. Set all hardware aside in labeled bags — never toss everything into one container. One mixed bag of screws from five different items is a guaranteed headache on moving day.
Step 4: Break Down Large Elements
If there are large panels — tabletops, doors, headboards — remove them with the help of a second person. Pay attention to proper storage of each part for easier transport. Wider seats, heavy backs, and solid tops need someone to support them while the other person works the fasteners. Dropping a panel leads to chipped edges, torn upholstery, and scratched floors.
Step 5: Protect Surfaces and Edges
Before packing, wrap each part in protective material to prevent damage during the ride. Use stretch film, bubble wrap, or soft blankets to shield surfaces from scratches and impacts. Corners deserve special attention — cover them with cardboard corner guards. Exposed metal parts should be wrapped separately so they do not puncture neighboring soft surfaces.
Step 6: Pack and Label
Place the disassembled furniture into appropriate packing materials — cardboard boxes, padded bags, or blankets. Use a numbering or marking system to simplify unpacking and reassembly. On each wrapped part, write its name or number and mark the box it goes into with matching labels.
It also helps to keep an inventory list where all parts and their labels are recorded. This lets you verify that nothing was lost or left behind during the move.
Keeping Your Hardware Safe
Even simple furniture contains screws, washers, dowels, and sleeves of different sizes. Never dump all the hardware into a single bag.
Sort fasteners by the part they belong to:
- Left side panel
- Right side panel
- Back panel or headboard
- Legs and supports
- Module-to-module connections (for sectional pieces)
- Fold-out or slide-out mechanisms
Write on each bag with a marker. You can tape bags directly to the corresponding section with masking tape or put them all in a separate small box. The key rule — do not leave small parts rattling around inside drawers or storage compartments, where they will shift and disappear.
If original assembly instructions survived, slip them into a clear bag and tape them to the furniture on top of the wrapping film. That way you will not have to dig through boxes hunting for the manual when it is time to rebuild.
Video the Process
When you are taking apart furniture that uses cam locks, eccentric connectors, barrel nuts, or other complex joints, record the disassembly on your phone. Film the connections up close before and during removal. Without those clips, figuring out the exact position of washers, spacers, and spring clips can be surprisingly difficult.
Protecting Edges and Surfaces During Transport
The first layer on every part should be a soft material — a furniture blanket or non-woven fabric — followed by stretch film or bubble wrap for rigidity. Then place the wrapped piece into a box with additional packing material to keep it from shifting.
Leather and vinyl surfaces need extra caution. Tight plastic film left on for a long time can leave creases and marks. Always put a breathable layer between the surface and the outer wrap.
During loading, place heavy items closer to the walls of the truck. Use cardboard dividers or moving blankets between pieces. Secure doors, drawers, and any moving parts with stretch film so they do not swing open in transit. Fix mirrors and glass panels upright, never flat. The same loading rules apply to long moves from homes in Oceanside.
Common Mistakes That Lead to Damage
Skipping the Inspection
Unscrewing every visible fastener without understanding the structure is a recipe for trouble. Some of those screws hold the load-bearing frame. Before each step, figure out what the joint actually does.
Working Alone
You can remove a small leg or a cushion on your own. A wide seat panel or a heavy back requires a second pair of hands. A dropped part means chipped laminate, ripped fabric, and dented flooring.
Lifting by Protruding Parts
Never carry a cabinet or a sofa frame by the armrest or a decorative overhang. Those parts are rated for normal use, not for bearing the weight of the whole piece. Lift from the bottom frame.
Disassembling a Working Mechanism for No Reason
If the dimensions allow you to carry the item out, further teardown is unnecessary. Separating hinges, rollers, or fold-out rails will void the factory adjustment.
No Photos, No Labels
Parts that look identical may differ in length, thread pitch, or mounting hole position. Photos and labels eliminate guesswork and prevent forced reassembly.
Forgetting to Lock Moving Parts
A fold-out or pull-out section can spring open on a staircase or in the truck. Before carrying anything out, strap or tie every moving component closed. Do not apply adhesive tape directly to upholstery — it will peel the finish.
Reassembly at the New Place
The reverse process starts with laying out all sections and checking that everything is accounted for. Do not tighten connections all the way immediately. First, thread them in loosely, align the frame, and only then gradually snug each fastener down.
Connect the main modules first. Then install the back, outer panels, and legs. Soft cushions and pillows go on last.
After finishing, check the stability of the piece. All support points should touch the floor. The frame should not rock. Then slowly open and close any fold-out or slide-out mechanism several times.
If the mechanism moves with resistance, makes scraping noises, or one side travels faster than the other, stop. The frame may be installed crooked, or a fastener may be in the wrong hole.
Careful preparation lets you move furniture across San Diego County without damage and without unnecessary tampering with its internals. The principle is simple: do not disassemble more than the doorway demands, photograph every joint, and protect every section. Then reassembly goes smoothly, no parts go missing, and the furniture keeps its look and its working mechanisms.
If restoration work means your furniture has to leave the house, our crew can take it apart, store it and put it back together — see pack-out help for San Diego homes or read about our crew and storage facility.