

Where the Water Comes From
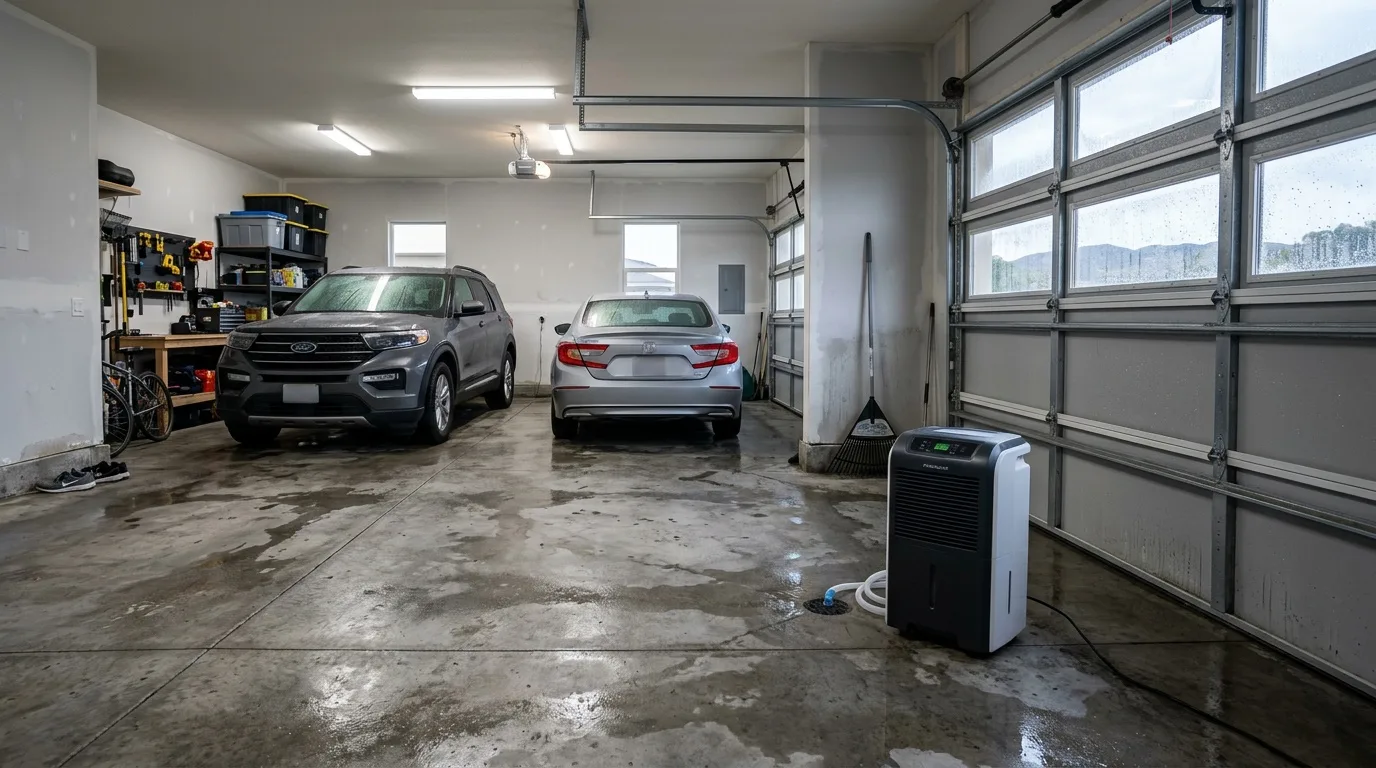
Drops slowly creeping along the ceiling and dripping onto the car roof. Walls that are perpetually damp, shedding paint. The stale smell of dampness and that telltale orange film of rust on your tools. If this picture is familiar, condensation has settled into your garage. It is not just water — it is an aggressive force that slowly destroys the structure and everything stored inside. Left alone, this dampness can reach the point of needing water damage restoration. Trying to fight it by simply airing the space out now and then is like bailing water with a sieve.
Condensation forms because of the temperature difference between a cold surface and the warmer, moisture-laden air inside the space. Think of a bottle pulled from the refrigerator — it "sweats" instantly. The same thing happens in your garage. To stop the weeping walls you need to strike on two fronts: raise the temperature of the surfaces themselves (insulation) and lower the humidity of the air (ventilation). Only the combination of both methods produces a reliable, lasting result.
Three Main Sources of Moisture in a Garage
Before starting the fight, it helps to understand what you are fighting. Moisture in garage air does not appear from nowhere. As a rule, it has three principal sources.
- The vehicle. This is the main supplier of moisture. In winter you drive in with a car covered in rain or morning dew. The water pools on the floor, evaporates, and saturates the air. In Vista's mild winters this happens less dramatically than in colder climates, but coastal humidity more than makes up for it — the air already carries plenty of moisture from the Pacific. Homes in nearby Oceanside sit even closer to that ocean moisture.
- Ground moisture and human activity. Every time you spend time in the garage, you exhale warm, humid air. If the garage has an unfinished earth floor or a poorly waterproofed cellar beneath it, moisture will constantly rise from the soil and feed the air above.
- Absent or poorly functioning ventilation. Even a small amount of evaporating moisture, with no way out, accumulates in the air to a critical level over time. Trapped humid air is the ideal environment for condensation to form.
Front One: Insulation — Making Walls and Ceiling Warm
The core task of insulation is to raise the temperature of the inner surface of walls, doors, and ceiling so that it does not reach the dew point. When a wall is warm, moisture in the air simply has nothing to condense on. For a garage — especially a concrete or metal one — extruded polystyrene foam (XPS) is an ideal choice.
Why XPS?
This material has virtually zero water absorption. It does not fear moisture, does not rot, and does not serve as a food source for mold. Unlike mineral wool, which loses its properties when wet, XPS keeps its effectiveness even in a damp garage environment. It is also sturdy and easy to install.
Insulating the Walls
The process involves several steps. First, walls are cleaned and treated with an antiseptic primer to kill fungal spores. Then XPS boards — for a garage, 2-inch thickness is usually enough — are glued to the wall using specialized adhesive foam for thermal insulation. It is important to apply the adhesive so that no air pockets remain under the sheet. After mounting the insulation it needs to be covered: a furring frame is installed over the XPS, and then a finish sheathing is attached — OSB, fiber-cement board, or moisture-resistant drywall. This creates a solid surface ready for finishing.
Insulating the Ceiling
The technique mirrors wall insulation. XPS boards are glued to a concrete ceiling or fitted between the framing members. This matters especially for metal garages, where the roof is the main cold bridge.
Insulating the Garage Door
A metal garage door is an enormous thermal bridge. It must be insulated as a priority. On the inner side of the door a wooden or metal lattice frame is assembled, and XPS boards are pressed tightly into the cells. All joints should be sealed so that insulation effectiveness is not undermined.
Front Two: Ventilation — Moving Humid Air Out
Even a perfectly insulated garage will turn into a thermos if humid air is not removed from it. Properly organized ventilation is the second mandatory component in the fight against condensation. The simplest and most effective scheme is natural supply-and-exhaust ventilation.
How It Works
The scheme relies on natural draft: warm, light, humid air rises and exits through the exhaust opening, while cooler, drier outside air enters through the supply opening to replace it.
Supply Opening
It is arranged in the lower part of one wall, 6 to 8 inches above the floor. This can simply be a pipe run through the wall to the outside and covered with a rodent screen.
Exhaust Opening
It is placed diagonally from the supply opening, in the upper portion of the opposite wall, 4 to 6 inches below the ceiling. To strengthen the draft, the exhaust pipe should be extended 20 to 24 inches above the roofline.
Sizing the Pipes
A rough calculation for vent pipe cross-section: about 0.6 inches of diameter per 10 square feet of garage area. For a standard two-car garage of roughly 400 square feet you would need a pipe around 10 inches in diameter, or two pipes of 5–6 inches each. In practice, standard PVC pipes of 4 to 6 inches are most often used, with two supply openings and two exhaust openings.
For enhanced natural ventilation, small inline fans can be installed at the pipe ends. They are inexpensive, draw very little power, and noticeably improve airflow on still Vista days when natural draft alone is sluggish.
Front Three: Waterproofing the Concrete Floor
If your garage sits on damp soil and the floor lacks quality waterproofing, moisture will constantly seep upward. In that case even insulation and ventilation may not fully cope. The solution is to create a waterproofing barrier.
For a concrete floor this can mean treating it with a penetrating waterproofing compound or applying a layer of bituminous mastic followed by a new screed on top. This step cuts off the supply of ground moisture and significantly dries the air in the space.
If the floor is bare earth, the first step is to concrete it entirely — including the inspection pit, if there is one. Lay a polyethylene vapor barrier over compacted gravel, then pour the slab. The key is to cover the entire floor area with no gaps.
Preventing Condensation Day to Day
Garages typically lack heating and air-drying systems. Therefore, following a few practical rules during everyday use goes a long way toward keeping moisture at bay.
- Let the car cool before closing up. In cooler months, do not immediately seal the garage after parking. Let the vehicle cool first so that the moisture it brought in can escape while the door is still open or the vents are active.
- Clear precipitation from the body. Wipe down or blow off water from the car before long-term storage. Standing water on the floor is the single biggest source of evaporation.
- Avoid intermittent heating. If the garage is not used consistently, heating it on and off does more harm than good — every warm-up cycle generates a fresh round of condensation when the heater goes off and surfaces cool.
- Periodic drying. Running a portable dehumidifier or a construction-grade fan for a day after a heavy rain or a particularly humid spell helps reset the moisture level inside.
Do Not Forget the Space Below
A garage cellar or utility pit is convenient — many Vista homeowners use it for storage. But dampness in the garage is often tied directly to what is happening below.
A few points to keep in mind when maintaining a below-grade space:
- The cellar exhaust must not connect with the upper garage ventilation. Each space needs its own independent circuit.
- The cellar entrance — hatch or trapdoor — must be sealed properly. Rubber weatherstripping glued along the lid edges works well.
- For floor waterproofing in the cellar, spread a 4- to 6-inch layer of sand or gravel, cover it with polyethylene sheeting, and spread another layer of gravel on top.
- When coating cellar walls with concrete, adding liquid glass (sodium silicate) to the mix improves water resistance.
- Remember that the cellar needs its own insulation and ventilation, otherwise stored items will not last.
Summing It Up
A dry garage is not the result of a single action but the product of a coordinated system. Insulation wraps your garage in a warm, moisture-proof jacket, and ventilation lets it breathe by carrying excess humidity away. Only this combined approach — where every element from the XPS board to the ventilation pipe does its job — allows you to defeat condensation for good. It is an investment not only in protecting your car and tools, but in the health of the structure itself, which will stop deteriorating from the inside out.
If condensation has already warped drywall or rotted trim in your Vista garage, see water damage restoration in Vista. Closer to the coast, we also handle water damage in Carlsbad homes.